Stucco is a popular choice for home siding because it’s attractive, energy efficient, and requires relatively little maintenance. But stucco can be prone to damage as the weather turns colder and rainier. Fortunately, minor cracks and chips can be repaired with caulking and paint. Larger cracks and holes, however, require more work. Read this article to learn more about Stucco Repair Philadelphia.
Stucco can be quite resilient and easy to make repairs on. This is due to the fact that it can be repaired at a surface level or its core – depending on what type of repair is needed. Repair is often used for damage resulting from a specific event and is generally easier to do than remediation – which requires extensive work on the interior of a home.
Stucco crack repair is typically done to protect the wall from water penetration. This is especially important for areas around doors and windows, which tend to be the first place moisture can be detected.
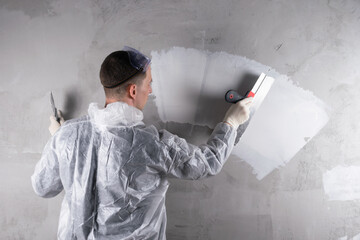
The first thing to do is remove any debris from the area of the wall that needs repair. This is important to prevent the debris from falling back into the crack as it dries. Then vacuum the area to remove any dust that may be clogging the crack.
Now that the walls are clean, it is time to prep them for the caulking compound. You will want to read the product’s instructions carefully to ensure that you are using it correctly.
If you have any questions, always consult with the manufacturer for answers. Once you are ready, mix the compound as directed on the label. It will be liquidy at first, but as it dries, it will become gel-like and will stick to the walls.
Once the caulk is applied, press into it coarse sand or fine gravel (not enough to fill the crack, just enough to cover it). Use your finger and push it into the caulk, and then use a trowel to smooth it out. This will help give the surface a natural appearance and allow you to match it with the surrounding stucco.
Once this has cured, paint the area. This will seal the crack and prevent water from seeping behind it. You will likely notice that the finished repair feels a little flexible to the touch. This is a good thing, and it attests to the strength of the patch.
One thing to keep in mind is that while repairing cracks is very important, it will not fix any underlying issues. If you have moisture in the walls, it will simply continue to penetrate and cause problems throughout your home. For this reason, it is critical to consider remediation when you begin to see cracking in your stucco.
Repairing Loose Lath
Stucco is a plaster-based surface that can become damaged over time. While this is typically not a sign of structural problems, it is important to address cosmetic damage so that it does not mask larger issues.
Identifying areas of loose stucco begins with a thorough inspection. Generally, unsound areas will be evident by bulging, cracks and holes that do not spring back when touched. In addition, these areas will usually echo with a hollow sound when tapped gently with a wooden or rubber-surfaced hammer.
Once identified, any loose or crumbling areas of the stucco should be chipped away with a hammer and cold chisel until the substrate is exposed. A wire brush may be used to remove any plant growth, dirt or old paint that remains. This step is critical, as a good bonding surface is necessary to achieve a successful repair.
Assuming the lath is still attached to the substrate, a decision can be made as to whether to try and reattach any loose sections of the wood lath, or replace them with new galvanized metal lath if authenticity is not an issue. When using a steel lath substitute, it is recommended that the new product be fastened with galvanized nails, rather than staples, as the latter are more likely to cause further problems by rusting and deforming over time.
If the lath is not intact or has deteriorated, the area should be fully repaired before applying any new stucco. This will involve a full restoration process that includes removing the loose material, installing new building paper and metal lath, and then applying three coats of stucco.
While this is a labor-intensive process, it is critical for a successful repair. It is also important to ensure that any new materials installed are alkaline tolerant, as many conventional pigments will fade and discolor over time. Today’s manufacturers of pigmented concrete and stucco are developing new formulations that will perform well over the long term, even in harsh weather conditions. In addition, these products are often more cost effective and faster to install than traditional pigments.
Repairing Stained Areas
Stucco is a popular choice for exterior walls, not only because it looks great but also because it’s an eco-friendly building material composed of limestone, concrete, and sand. But like any building material, it’s susceptible to damage. It’s important to keep an eye out for signs of damage and address them immediately. Stucco that’s damaged can lead to moisture penetration and all sorts of other problems, including mold, rotting wood, and peeling paint. Moisture penetration is hard to see on the surface, but you can usually tell by looking for staining and cracks around windows, doors, or fixtures.
Stains on a stucco wall can be caused by dirt, mold, mildew, or even rust, and they’re not always easy to get rid of once they set in. But the good news is that, in most cases, a little cleaning and a fresh coat of paint can take care of them.
Before attempting to clean or repair stained areas in your stucco, you’ll need to rinse down the surface with water first. This will remove any loose dirt, dust, and debris and give you a better idea of the condition of your stucco. A regular garden hose with an attachment is usually sufficient, but you can also use a pressure washer to really blast away the gunk.
After rinsing, you’ll need to prep the area you’re repairing. A mason’s chisel and hammer should be used to chip away any loose or crumbling pieces of stucco. A piece of house wrap or felt paper should be cut to the size of the damaged area and secured firmly to the studs or sheathing with tin snips. You’ll then want to seal the wrap seam with acrylic exterior caulk.
Once the sealant has dried, you’ll need to apply a layer of plaster over the area. A stucco mix can be purchased at home improvement stores and is ready to trowel on, or you can make your own by mixing lime, cement, and sand in a wheelbarrow or plastic tray following the manufacturer’s instructions. A notched trowel is recommended for this job, as it can help you to create the desired texture in your re-plastered area. Once the scratch coat has dried completely, sponge it with water to help future coats adhere better.
Repairing Water Damage
Stucco is an excellent siding material that protects homes from the elements, but it needs to be maintained and repaired to ensure it does so effectively. Whether from rain or a faulty roof, if a stucco installation isn’t done correctly, cracks will appear and moisture will seep into the walls, creating unsightly dark spots on the exterior and contributing to lasting structural damage. These issues may be minor, but they need to be addressed immediately so that further damage can be avoided.
A professional will perform a thorough inspection of your home’s stucco, using a moisture meter to check for any signs of water intrusion. They will then make sure that all underlying problems are addressed, including mold and wood rot, before tackling the repairs. Then, they’ll install new weather barriers and flashing to help prevent future moisture intrusion.
While many homeowners are tempted to do the stucco repair work themselves, Cantor says that it’s best to leave the job to a stucco pro. He recommends starting by removing the damaged area with a hammer and chisel, taking care not to damage the lath supports and house wrap. Then, tin snips can be used to remove any rusty or corroded sections of the sheathing. The sheathing should then be cleaned and allowed to dry completely before attempting to patch the stucco.
Once the sheathing is clean and dry, a masonry trowel can be used to apply a base coat of stucco mix to the wire mesh and sheathing. Be sure to follow the manufacturer’s instructions for mixing the stucco to get the right color and texture. Once the base coat has dried, you can paint it if desired.
For more extensive or widespread damage, you can use a stucco patch mix to cover up the dark patches. The patch will need to be pigmented to match the existing stucco, but this is an easy fix for a stucco contractor or handy homeowner. To prevent the patch from fading over time, you can also add a water-resistant coating to the surface of the stucco.